
The tech advances in the past couple of years have really changed our world and how we do and complete most of the things on a regular day-to-day basis. Of course, here, we are not talking solely about AI, VR, or cryptocurrencies that are known and popular across the globe, but more about those not that familiar terms and things that still make our life much easier and, what’s even more important, less costly.
For many years these two terms didn’t go hand in hand as many believed that if something is easier and less costly, it needs to be of less quality. Today, luckily for us, this is simply not true, as due to technology, we can do and get things of equal quality at a much lower price. Another contributor to overall price fall is the competitiveness, and that’s closely connected to the Internet, as now, we can easily browse the net and find something that costs less.
Table of Contents
A brief history of the photo etching process
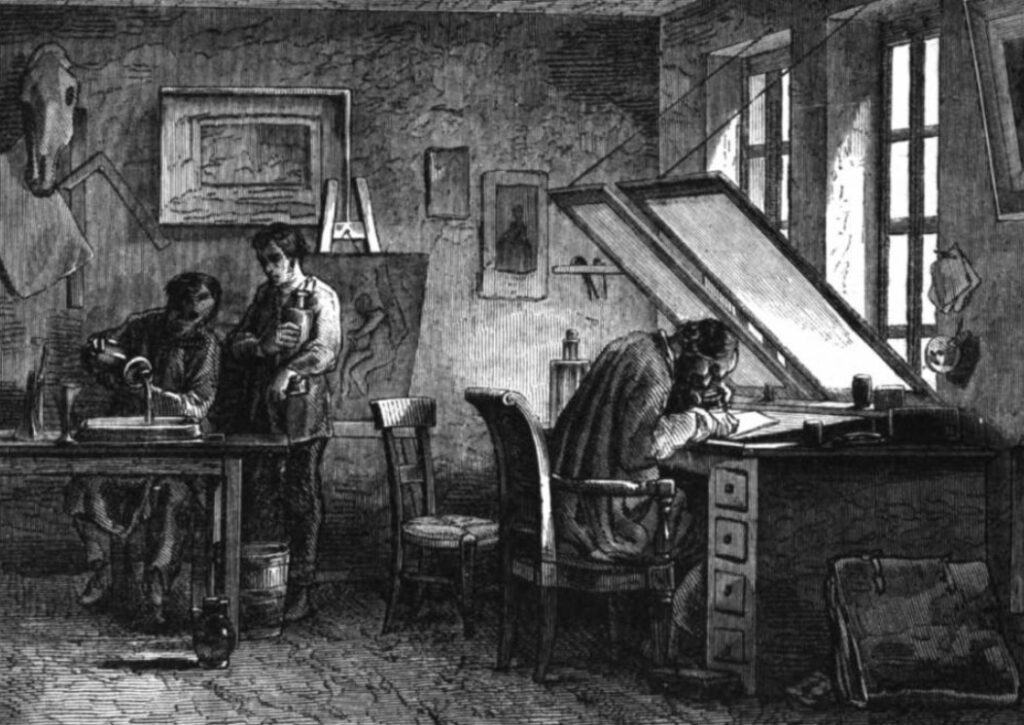
Now, all of this mentioned above is just an example of how even tiny little change can have a big impact on how we perceive and do things, and how new industries are created and start, and even though our main topic today is about photo-etching that originates way back to 1820s, modern photoengraving process is a much more complex and of much greater precision and quality. On the other hand, for many, all of this is still relatively unknown, and many are wonderous about what it really is, so let’s first start by explaining the photo etching process a bit more and then go through top FIVE tips for a better understanding of this process.
What is photo etching?

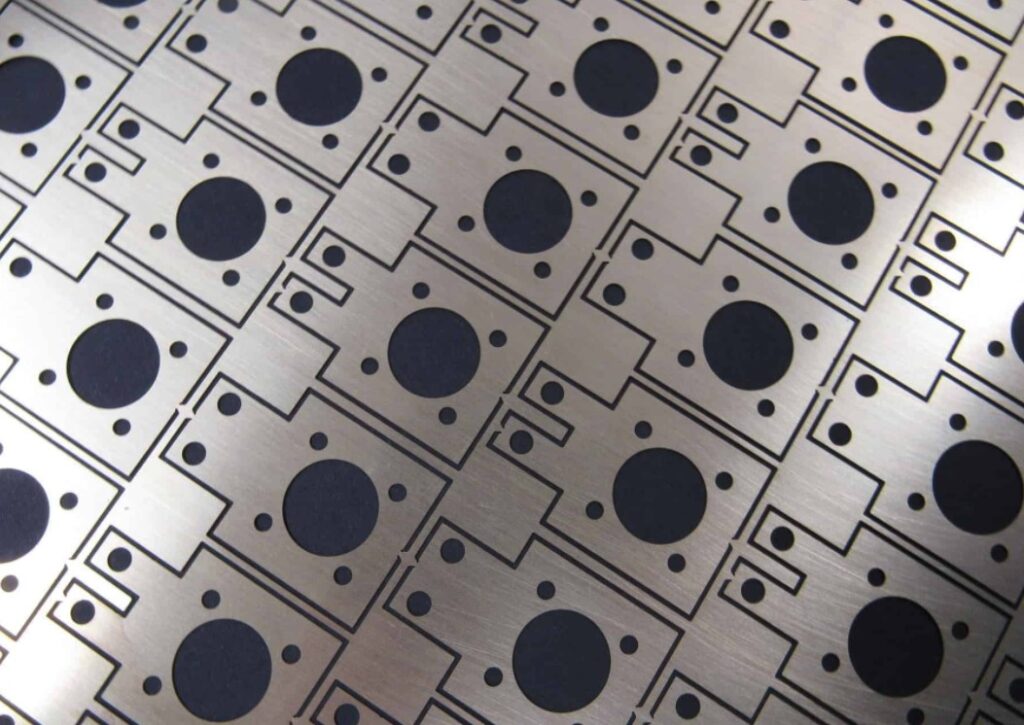
Let’s start by stating that here, regardless of the type of the process, it’s all about precision. Furthermore, don’t let the fact that it is about precision confuse you and think that it is reserved only for some delicate things, as the designs that are created on metal plates or parts can be less or more complex. This whole industry is one with the highest growth, and even though it all started as a part of artists’ enthusiasm, today, it is much, much more than just that. Namely, it’s a highly respected process used by many engineers, buyers, and manufacturers all over the world today because it is a less costly process but still provides a high-quality end product.
As you have probably guessed, due to its complexity, it is a multi-step operation where images are transferred on the metal parts/plates due to chemicals used to dissolve all unwanted and not-needed sections. As the end product, we get a part, or a design, of the right dimensions that are previously noted and calculated.
Now, when we know more about what photo etching is, let’s focus on the process itself.
1. Picking the right material and cleaning it
It all starts with choosing the material we want to use, which is not an easy job since we can choose among a lot of them. After making this difficult decision, it is time to clean the metal and do it properly, or etching will not be successful. Cleaning is done by using chemicals since it is the only way to be sure that all the dirt, oils, and any other impurities are completely removed. One of the most important things, when the cleaning process is done, is never to touch the metal without protection since touching it with bare hands can easily contaminate it, and the whole process needs to be repeated.
2. Lamination and printing
When the metal is completely clean, it is time to apply photoresist film to separate the areas that should not be etched from those that should be. It is important to apply it on both sides, and it is done by laminating or rolling with the help of the high temperature, pressure, and water in some cases. After that, it is time to make the “masks” out of mylar or glass that will have the negative image of the shape we want to create and guide the laminated material between them. When the negative image on both masks is created, we need to use UV light and shine it through them. It will transfer the image to the areas that are not covered by masks, and we will be able to see the image on the metal sheet.
3. Developing and etching
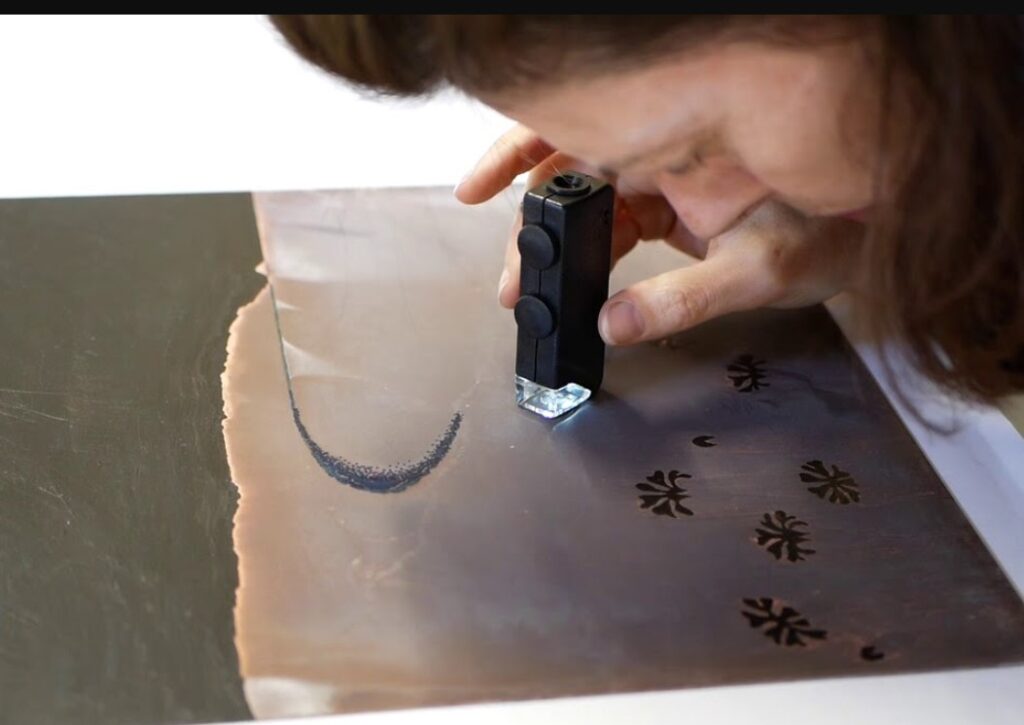
Transferring the image to the metal is not the end of this complicated process, and after that, it is necessary to use chemicals and develop the material. That simply means that those chemicals remove all the unprotected areas and leave the shape that will be the final product, which is already protected by the film. The next step is putting the metal into the etching machine and spraying the etchant to dissolve the unprotected metal and get the final product. This etching bath should be carefully monitored because of many parameters that need to be set correctly.
4. Stripping and cleaning
At the end of this complex process, it is necessary to remove the film from the metal, and once again, we need to use chemicals to do that. After stripping the photoresist film, we will have the final products ready for inspecting and looking for any possible defects. If everything looks alright, it is time for the rinsing with reverse osmosis water and deionized water and drying, and the final product is finally finished.
To summarize
It is impossible to understand the process without knowing its steps, and that’s why we have tried to explain all of them better to you. Although photo etching indeed is a complex process, it is not that complicated to understand it when you understand all its steps separately. For those people who want to learn more about Photo Etching and maybe order some products made in this way, metaletching.com can be the best choice, as they are proven to create products of high quality.


